 |
 |
DESIGNING AND BUILDING A HOME STUDIO:
|
|---|
This is the third and final article in a series on how I built a home studio in my garage so that I can practice drumset without disturbing neighbors and family members. In two previous articles I discussed the need for a home studio, how I set out to have my studio constructed, and how I ended up working with an architect, acoustical engineer and a contractor. In this final installment I will describe in detail the design and construction of my studio.
In previous articles, I discussed working to design my home studio with Ron Hobbs (architect) Bill Johnson (acoustical engineer) and Norman Phillips (contractor). These men took some guidelines of what I wanted the studio to be, and designed a set of plans that a contractor could use in actually building the studio.
As we got closer and closer to finishing the design of my studio, my concern was, do these plans work? Will the design be effective in containing the sound of my drums or will the neighbors continue to be annoyed by my daily practice sessions? There was no simple answer to these questions, however, we were able to come up with a few answers through some careful study.
As I worked with Ron Hobbs, Bill Johnson, and Norman Phillips, not being musicians themselves, they all kept wanting to know "how loud are drums"? Since I am not skilled in the scientific aspects of acoustics, I wasn't able to give a precise answer to that question. In fact, very few drummers that I know can actually explain to a non-musician the acoustical occurrence which takes place when a drum is struck. The answer which I kept giving, unhelpful as it may have been, was something like "well, pretty loud". Unfortunately, that wasn't of much help to my colleagues in their efforts to effectively design my studio.
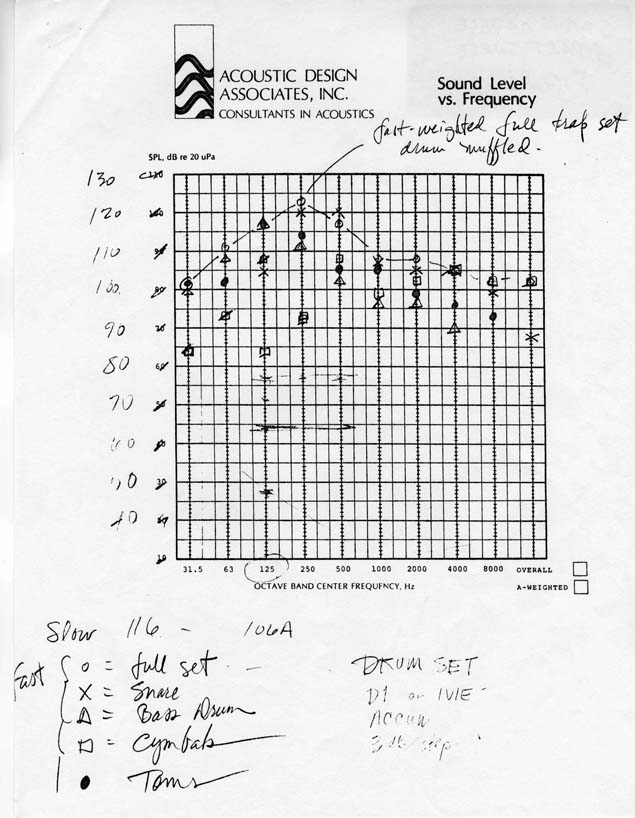
What I suggested was, invite Bill Johnson, who is an acoustical engineer skilled in the knowledge of sound transmission, to come over to my house and take acoustical measurements of my playing. Then we would be able to analyze the frequency and decibel occurrence involved when I play and therefore be able to check the studio design to see if it is effective.
We set up a date and Bill came over with a device called a Spectrum Analyzer, which measures sound according to frequency and loudness. It gives a sophisticated digital readout on a monitor. Bill set up his meter next to my drums, which were located in an unused bedroom of our house back in those days, and we both agreed that the best way to check the sound was for me to play at the highest volume that I ever play. I started into a wild double bass solo that literally shook the walls of our house. Bill stopped me long enough to readjust his analyzer. The meter hadn't been adjusted to measure anything that loud. With the meter reset, I continued bashing away once again.
We ended up taking several readings. We took readings on full trap set and also individual instruments such as snare, hi hat, cymbals, bass drum, and toms. The snare and bass drums were the loudest (120+ db) and the hi hat and cymbals, although not the loudest decibel-wise had the highest frequencies.
 |
|---|
The challenge in the studio design was to construct a facility which would contain a great number of decibels as well as a wide spread of the different frequencies involved in playing drums.
It would have been good for Bill and me to have taken readings on several other percussion instruments such as timpani, bells, marimba, etc., which I also play, but I felt like if we could design a room which was strong enough to contain the spread of decibels and frequencies present on trap set, the studio would be adequate for most any type of percussion instrument.
We also went outside the house and took noise level readings around the garage (where the studio was to be located). Our house is located in a suburban neighborhood in the Dallas area. There is a moderate amount of outside noise in our neighborhood which ultimately helps the studio design by masking or dissipating the sound of drums that leak through the studio walls. The next door neighbors have a heat pump located 25 feet from our garage which is in use year round. There is also a four lane street one house away which handles quite a bit of traffic each day, and a noisy interstate highway about a mile away. In addition to birds, insect noises and overhead air traffic, all of these exterior noises help to mask the sounds coming through the walls of my studio and eliminate them before they reach other people's ears. The decibel measurement of outside noise that particular day was about 75 db.
 |
|---|
Mathematically speaking, the loudest I play my drums is approximately 120 db. The studio walls that Bill recommended were roughly estimated to have a sound rating of about 60-70 db. The approximate 50-60 db of sound which will still escape through the studio walls isn't as directional as if one were standing in front of a stereo speaker that was playing at 60 db, and hopefully, the amount of outside noise around the neighborhood will counteract enough of the leaking sound so that no one living nearby will be able to hear me. In other words, the design for my studio was judged adequate for its' intended use. That was great news!
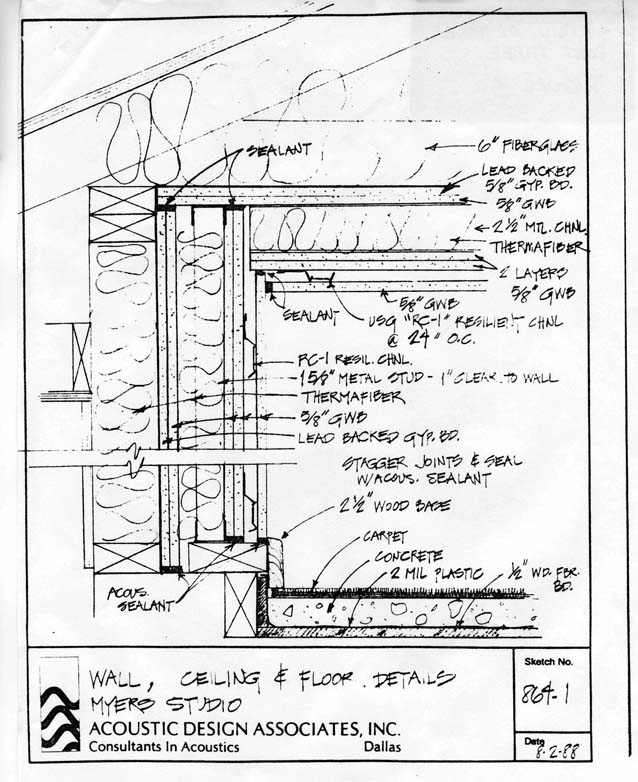
Ron Hobbs, Bill and I were all happy with the results of the playing tests and how they matched up to the design of the studio. Bill still made a few small adjustments to fine tune his plans and then submitted them to Ron and me for approval. These plans are what Bill Johnson submitted as an effective design acoustically for the walls, floor and ceiling of my studio. Notice, the studio is actually six separate rooms built inside of each other with two layers of sound insulation packed between different walls.
 |
|---|
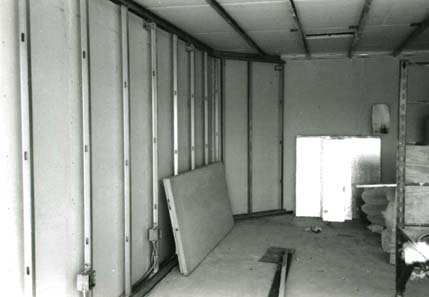
Other careful acoustical considerations were made such as sound absorbing clips attached to the next to last layer of sheetrock. (The principle here is that the clips absorb sound vibrations from the inner studio wall and prevent them from being passed through to the other layers).
 |
|---|
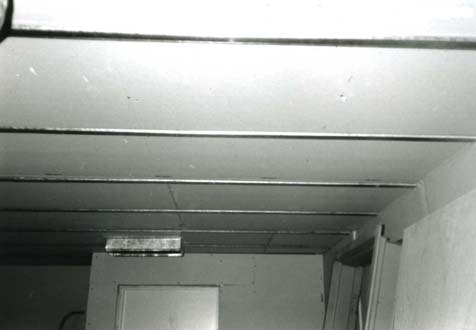
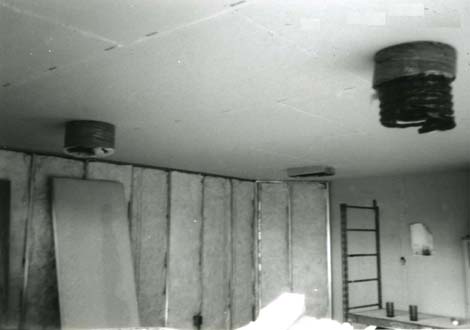
Horizontal strips across the ceiling are
sound clips which absorb vibrations.
Also, one of the layers of sheetrock is lined with lead which, in itself works very well to keep the sound inside. The different layers of sheetrock were staggered and all the joints were sealed with acoustical sealant. Acoustical sealant was also applied between the sheetrock and the floor and the sheetrock and the ceiling so that vibrations cannot pass from the floor to the walls. The studio was also designed so that no layers of wall come in contact with the floor or ceiling.
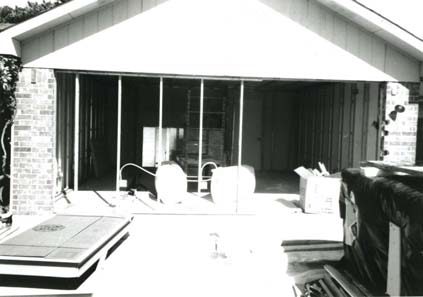
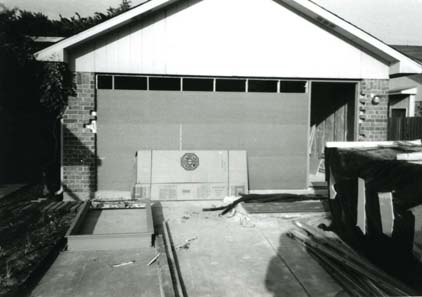
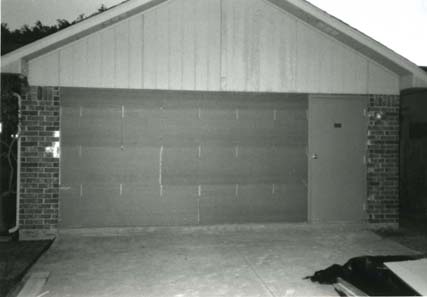
The garage door was removed and the resulting open space was framed and bricked from the outside with the same treatment of walls on the inside. The brick not only gives the studio a better look from the outside but the mass involved with the sound wall combined with the brick further helps to contain the low frequencies of instruments such as bass drum.
 |
 |
|---|
The other two outside walls of the garage were deemed adequately constructed with the present existing wood exterior, and the fourth wall of the studio is bordered by the house.
The studio ceiling has the same number of layers as the walls. It would have been easy to overlook designing a good studio ceiling but there would have been quite a bit of sound leakage through the ceiling and roof. The ceiling here was designed exactly the same way as the walls, with extra heavy insulation applied in the attic immediately above.
The floor construction was also carefully planned. The original garage floor slanted down toward the garage door opening for drainage purposes. The studio floor (when constructed) was leveled. In the leveling process, 1/2 inch fibre board was placed on top of the existing garage floor and cement was poured on top of the fibre board to level the floor. This is known as a floating floor because the floor is actually floating on top of the fiberboard and is not part of the foundation slab that the rest of the house sits on. Therefore, vibrations originating from the studio are retained in the fibre board and cannot be transmitted inside or outside the house by way of the foundation.
Another method of flooring that we considered (and is often used in studios) is building a leveled wooden floor on top of wood planks. Although this method is cheaper than paying for concrete, it is also much less effective acoustically. Also, with age there is the problem of squeaks and other unwanted noises from the wood when walking on it (similar to second story floors in many two story homes and cheap motels). I was concerned with the annoyance of these unwanted noises and the possibility of them accidentally being recorded on tape during home sessions. So, that is why we decided on a floating concrete floor instead of a wooden floor.
The carpet that was called for is a cut pile which was installed on top of a foam pad (for greater sound absorption). The cut pile carpet is good for the amount of traffic coming in and out of the studio and also for the amount of equipment which gets moved around, and it looks nice too.
Most of the studios I have ever practiced and recorded in have had poor or unacceptable ventilation. I was very concerned about designing an effective ventilation system for my studio as well as one which would operate quietly without making a lot of noise. It was not possible to patch into our home heating and air conditioning system for the studio for two reasons: the home system is just barely powerful enough to heat and cool the house without attempting to heat and cool another 400 square feet of space; and, there would have been a great deal of sound from the studio transmitted through the ducts back into the house if we had tried to patch into the home system. Instead, we decided that a separate heating and cooling system should be installed, just for the studio.
Although the separate heating and cooling system eliminated many problems, it did bring about some additional problems. For example, how could a ventilation system be installed without the sound still coming up through the vents into the attic and then leaking into the house or outside? Could a system be designed and installed so that it would heat and cool the studio adequately? Could a system be installed which would be quiet enough to enable me to record with the air on without air conditioner noise going onto the tape?
Once again, Ron Hobbs, the architect helping me design the studio, came to the rescue and was able to design a great ventilation system with a little help from some of his engineering buddies. This ventilation system not only gets the job done, but is completely quiet in operating and does not leak sound out of the studio. The way Ron designed the system was to specify a slightly more powerful air conditioning system than is actually needed to heat and cool the studio. A 400 square foot room like this one would normally call for about a one ton air conditioning unit to cool and heat it. Instead of going with a one ton unit, Ron specified a one and three quarter ton unit. With the extra power of the one and three quarter ton unit, the system doesn't have to work at full capacity to do its' job, and can therefore heat and cool the room without making noise. (We have all been in buildings where the ventilation system makes whistling and other assorted noises.)
Ron also specified using larger ducts than were actually needed, similar to what would be found in a commercial building. With the larger ducts and the extra power of the unit, the air travels through the ducts at a slower rate, which makes the ventilation completely silent inside the studio. Two separate air vents quietly blow air into the studio, and about ten feet away, two return air vents serve as an escape for the air to return. This setup creates a nice circulation of air throughout the studio. To make the ducts more soundproof, each vent contains two layers of sound insulation. Several turns (or elbows) were also placed in the ducts between the studio and the unit, which is a common procedure used in acoustical facilities, in order that the sound of the unit can't be heard in the studio and the sound from the drums can't leak out through the ducts.
 |
|---|
Incoming air vents in the foreground
are lined with two layers of insulation.
One of the two return air vents is
shown in the background
The air handling unit is located in the attic just above our kitchen and the condenser is located on the side of the house just outside the studio. Neither unit can be heard inside the studio or house because they are both located on the other side of the studio sound walls, and the actual ventilation is so quiet inside the studio that it's impossible to tell if the air is running or not without feeling around the vents for air flow. The system works great and is absolutely quiet! Also, the studio is so well insulated because of the construction that it actually takes very little air to heat and cool it since there is nowhere for the heating and cooling to escape. It is similar to heating and cooling a cave somewhere underground!
One of the most frustrating aspects of the studio design was finding the appropriate doors to use. The studio configuration was such that it is necessary to have a door going from the studio back into the house, and another door going from the studio to the outside (for loading and unloading equipment). As evidenced above, great care has been taken in each step to insure the effectiveness of containing the sound inside the studio. So, in order to remain effective, the same care was necessary when designing what doors to use. Obviously, very strong doors had to be used to get the job done. The goal was to select a door which would be as effective as the construction of the walls. We started looking at several brochures from different sound door manufacturers and learned that the cheapest sound doors cost about $1,500 but still have a relatively low STC rating of about 40 which renders them pretty ineffective for the job that I needed done.
Sound doors are commonly categorized according to an acoustical standard which is known as an STC rating. STC or Sound Transmission Characteristic is a type of rating that a door is given according to the amount (db) of sound that it will prevent from passing through it. A door which is rated STC 40 would be able to hold approximately 40 decibels of sound from passing through it. However if a STC 40 door was used where there was 100 decibels of sound then about 40 db would be stopped and about 60 db would go right on through. Since we determined that my drums create about 120 decibels of sound, ideally I need a door with an STC rating of 120, but as far as I know, there's no such a thing.
Most normal household doors are hollow core wood doors and have an STC rating of about 10 (which means they contain only about 10 decibels of sound.) In contrast, a lot of commercial buildings use solid wood doors which have a slightly higher rating of about 30. Solid wood doors are heavier than hollow core doors, and are more effective acoustically, but can still be easily opened and only cost about $100. The use of acoustical seals around the door frame help give the door a tighter fit when closed and are very necessary when attempting to contain the sound inside a studio.
The $1,500 sound doors which have an STC rating of 40 were less than half as effective as the design of the walls and ceiling in my studio. So, that option was ruled out. Sound doors which were as effective as my wall design cost in the $5,000 range and need several professional wrestlers just to open or close them. There is also a waiting period of about four months for them to be ordered. So, that option was also ruled out.
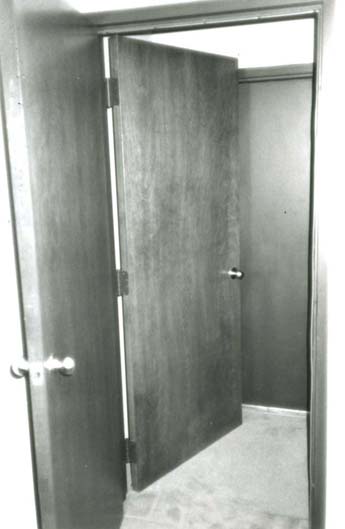
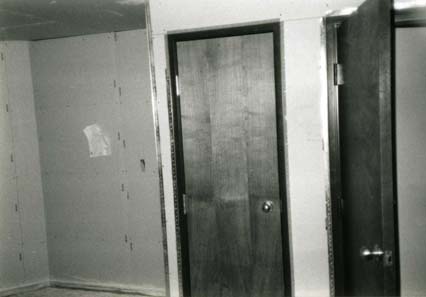
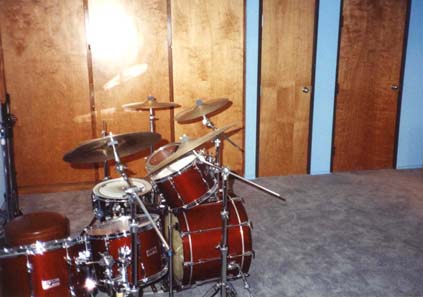
Ron Hobbs came up with an idea of using a combination of two solid wood doors to be mounted on a commercial metal frame plus an additional commercial metal door to possibly get the job done as good or better than sound doors and also save quite a bit of money since wood and metal doors are considerably less expensive than sound doors. A quick check was made with Bill Johnson, the acoustical engineer, to see if he agreed on the effectiveness of using three doors for each of the two studio entrances/exits. He did. The specifics of the design (as illustrated below) call for the metal door on the outside to open into a sound vestibule, which is actually a small room only big enough for a door to swing into it. Then there are two solid wood core doors which open opposite of each other and are mounted on a double frame. All door frames were carefully fitted with acoustical seals.
 |
|---|
The entrance to the studio from the house passes through a small laundry room which, in itself, serves as a vestibule. Two solid wood doors which open opposite directions from each other are mounted together on the entrance of the studio from the house/laundry room. These two vestibules serve as an extra trap for sound leaking through the doors.
This arrangement, although a little inconvenient opening and closing so many doors all the time, ended up being very effective in containing the sound inside the studio and is worth the trouble due to the amount of money it saved me.
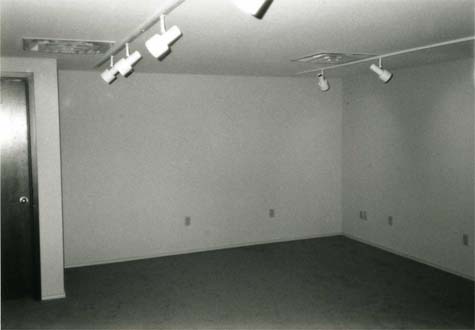
For studio lighting, I wanted to use track lights for a variety of reasons. I like the way track lights look in a studio; they're very flexible, and easily adjustable to highlight any instrument or object. The portability of the track lights enable me to spotlight music on a stand or a piece of equipment that I might be working with. They also give me the flexibility of having detailed lighting in selected areas without having everything extremely bright in the whole room. Ron suggested using two 16 foot white tracks with four white lights on each track (for a total of eight lights in the studio). Each light contains a 100 watt lamp. That configuration has worked very well.
 |
|---|
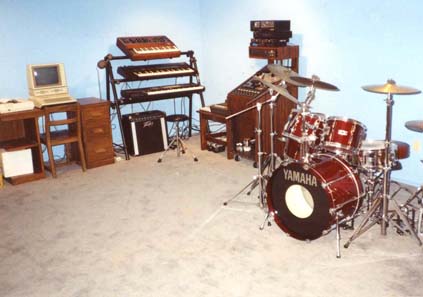
I specified a total of ten duplex electrical outlets in the studio. There are two outlets along a short wall, four and three respectively along the walls which run length wise and even an outlet inside the shelves. This system is very handy when working with electronic instruments because it seems like there are never enough outlets. Also, it is very convenient now to always have electricity nearby for a metronome or whatever else I might need to plug into an outlet.
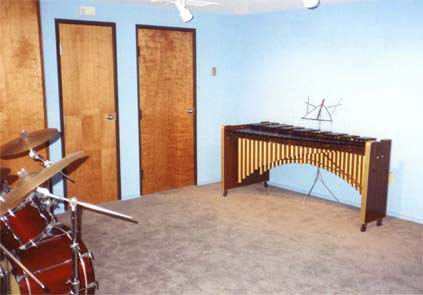
The color scheme of the studio (which I selected) is a deep blue paint for the walls, white ceiling and grey carpet. I wanted the atmosphere inside the studio to be completely different from our house (which is mostly white). The color scheme has worked well and with the track lighting the room is highlighted quite nicely.
The total designing process described above actually took almost two months after my initial meeting with the architect and acoustical engineer. Ron Hobbs was the person who took all the information from Bill Johnson and me and put it all together in a workable set of plans for Norman Phillips (the contractor) to use in building the facility. I spoke on the phone or in person with Ron almost everyday for several months to ask questions or answer his questions. The reason the design took so long was that Ron kept coming up with little things here and there which made the studio better acoustically and more cost effective. I was careful not to hurry Ron up and get the studio built quickly because, even though I was very anxious to have it finished, I didn't want to take any shortcuts that I would have regretted latter. All of the design revisions were okayed or vetoed by Bill Johnson every step of the way. The design actually kept changing slightly even after construction was begun due to some physical characteristics of the garage and house. In reflecting back, I'm really glad that I took the necessary time to do a good job and also for the fact that I had a good architect to work with because, the whole thing could have ended up being total chaos if I had rushed through it or had tried to design the studio myself.
With the design at long last complete, it was time to get a bid from the contractor and start getting a construction contract together. Ron Hobbs took care of getting a contract with Norman Phillips the contractor. Ron had some meetings with Norman and specified what materials needed to be used in order to get the job done effectively. Norman understood the critical acoustical nature of this job because he has built two similar studios in the past. He was a good person to be working with. Norman is also a pretty unique individual because he cared enough about my studio to make additional suggestions on how the design could be improved. We ended up using many of his suggestions. Also, after hearing some horror stories about other contractors, it was a pleasant experience to be working with someone who really did care and takes a lot of pride in his work.
A few more weeks passed and Ron submitted a contract to me that he and Norman Phillips had agreed upon. The contract was a very simply stated one page document outlining the work that Norman Phillips' company, Landmark Interior Builders Inc. would do for me. The total cost was $21,927. Although it seemed like an awful lot of money (initially over a year ago when I had first set out to have my studio built I was intending on paying between $2,000 and $5,000) I felt like it was a good investment towards a life long dream of having a place to practice and conduct my musical projects. I signed the contract without any hesitation.
Normally a contract like this could be many pages long and very complicated. In a contract, the contractor usually specifies what materials will be used to get the job done and spells out each individual detail. My contract was much simpler due to the fact that the contractor and architect knew each other well and had worked together many times before. Ron trusted Norman and I trusted Ron so, I felt confident that a simple contract would be adequate for my project.
The payment procedure (which was outlined in our contract) was: One third payment was due at the beginning of construction. One third payment was due after the walls, doors and electricity was in place. The final one third payment was due after I was satisfied with the final project. This was a fair arrangement and it worked well.
In a few days, everyone had obtained copies of the signed document and Norman went to obtain a construction permit for a garage conversion from the city. (Note: Anytime a construction project is begun, when living in the city, a local building permit must be obtained and posted on the construction site. This is usually done by the contractor. You, the owner, have to prove that what you want to do is not in violation of any local building or zoning codes. It would be a good idea to call these people at the beginning of any studio design to verify whether or not they will issue you a building permit to build your studio. If you call your local city hall, they can usually connect you with the building code department. In some areas, garage conversions are not allowed at all. In my particular case, I was lucky because if our home had been built two years latter than it was, I would not have been able to get a garage conversion building permit.)
In a few days after all the necessary documents had been signed and delivered, several truckloads of construction equipment accompanied by a small army of construction workers arrived in my back yard. Norman told me the complete job of building my studio would be accomplished in about a month. I felt like it would take at least twice that long (two months). Actually, we were both wrong. It took over five months from beginning of construction to making the finishing touches before the studio was completely done. However, I was able to move into the studio and start using it after about three and a half months of construction. I never attempted to rush the men or make them hurry carelessly.
It was exciting to see the construction being started after about 14 months of searching for a way to have my studio built. I watched my garage slowly transform into a home studio, one step at a time.
 |
 |
|---|
 |
|---|
Every couple of weeks Ron came over to inspect the work that the construction crew had done. I was very glad for him to come over each time because he was able to find little things wrong that I would have never noticed. It was also his job to communicate to Norman anything that was not being done according to the plans. Then Norman could instruct his workers how to get the job done correctly. There were only some minor problems here and there which the construction workers ironed out quickly each time.
Inspectors from the city came out from time to time during construction to make various inspections such as electrical, framing, air conditioning, and drywall. There were a few delays due to elements which prevented the inspections from passing and therefore delayed the continuation of construction. Although somewhat of a hassle, I realized that these inspections were necessary and served to make the facility safe.
There were also some typical problems that I encountered during the construction process such as: the men activating our home security system twice causing the police to come out, an electrician severing our phone line leaving us without any phone service for three days, workers taking some shortcuts instead of following the plans precisely, and a certain carpet company which kept promising to come over and install the carpet "tomorrow" for almost three weeks before suddenly going out of business. From what I have heard about other construction projects though, the problems I encountered were far less than what most people have had when dealing with these people.
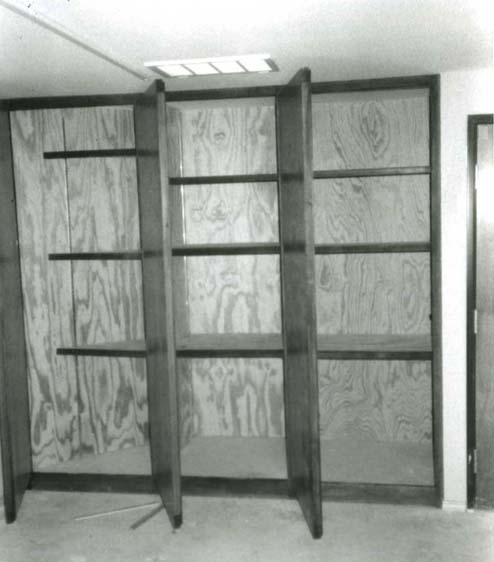
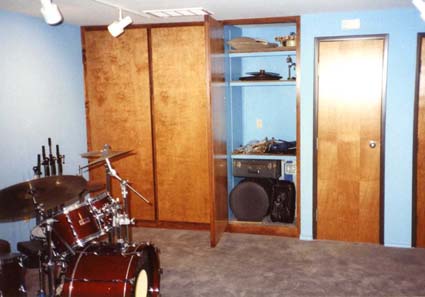
After the walls were all in place I hired a carpenter through Norman's construction company to come out and build me a custom set of shelves in a rather odd looking place in the wall which was left after the garage had been converted. The shelves have three columns and the individual shelves are adjustable with tracking. Large wooden doors were mounted on hinges in front of the shelves. The shelves really make the studio look nice and also do a good job of squaring the room better. I keep mallets, drums, cables, cases, etc inside of them.
 |
|---|
The days and weeks of construction seemed to slowly go by as I got more anxious than ever to move into the studio. Finally, the day came where the walls, carpet and doors were in place where I could move in and test the studio out for the first time. I have never been so nervous about playing drums as I was on this particular day. Thoughts were racing through my mind such as: "Is the studio going to work at all?". "What will it sound like in the house and outside when I am playing?" "Will I be satisfied with the results?"
The big moment was finally here. I had moved my drums into the studio and all the doors (six of them to be exact) were tightly sealed. I had Carol, my wife walk through the house and outside the house while I played. The results were actually better than I had expected. After collaborating with all of the people I had worked with over the last year or so, I knew that the studio wouldn't be 100% soundproof, so, I was hoping for extremely near soundproof, and that's exactly what I got! Now, when I play my drums full volume, the only sound which still comes through all of the layers of wall and doors is a little bit of bass drum. (This isn't too surprising because, all of my life when I have been around bands at football games and parades, the one instrument that I can always hear from the furthest distance is always the bass drum). The second instrument that can still be heard, although just barely, through the walls of the studio is the snare drum. After the walk-around-the-house-test, Carol and I conducted another test. I continued playing while she called the neighbors on each side of our house and asked them to please walk through their houses listening for the sound of my drums. Neither set of neighbors were able to hear any sound whatsoever inside of their houses. (This is a drastic improvement!) So, although there is still a minimal amount of sound coming through the walls which can be heard if someone is right next to the studio, persons in another corner of our house or in another house nearby can't hear any drums at all! I also figured out a simple way to make the studio even more soundproof. I put a big pillow inside the bass drum which muffles it quite a bit more and also makes it extremely hard to hear anything outside the studio now.
So now I have built my own little world away from the rest of civilization where I can retreat whenever I want and practice and create all kinds of neat musical things. If for no other reason, it's relaxing just to go inside my studio and shut all the doors because of the total quietness. You can't hear the phone, any outside traffic, or noise of any kind. It's perfectly quiet!
Ron was happy to hear how satisfied I was with the completed project. It seems strange though and maybe a little sad that this project is over now and we won't be working together anymore. Ron is now busy designing a police station for a neighboring town. Norman is also busy building a city hall for some nearby small town. Bill is still helping people design facilities which will be effectively acoustically, and I am staying very busy teaching drum lessons and practicing in my new studio!
I hope that this series of articles has been of some interest to those who attempt to design and build their own home studio such as I have. All in all, this is probably one of the hardest and most tedious projects I have ever attempted. There were many people along the way who told me that it couldn't be done, and there were many times when I was tempted to give up on the whole thing. I'm glad however that I stuck with it and saw the whole thing through. All of my hard work was definitely worth it. All through this project though, I kept kicking myself and asking the question, "wouldn't it have been so much easier if I had played the flute"?
 |
 |
|---|
 |
 |
|---|
Special thanks to Ron Hobbs, Bill Johnson and Carol Myers for their assistance in writing this article.
Read other excellent articles on home studio construction:
Acoustic Treatment For Home Studios
Soundproofing Advice and Information for Drummers
Back